I looked up many head model tutorials and found this one by James Taylor that i found worked for me best, I liked how he kept the head topology fairly low and it was easy for me to follow.
As I followed his tutorial it was going well until i got to the nose and that where it got confusing for me. There as a lot of extruding and deleting of faces to get rid of any ngons or triangles, without the tutorial I don’t think I would have done this successfully. When it came to doing the cheek I didn’t mind this part because I used my research to get the correct placing of my cheek bone and surrounding fat in my cheek area and as well as staring at my face in the mirror I had while modeling my face.
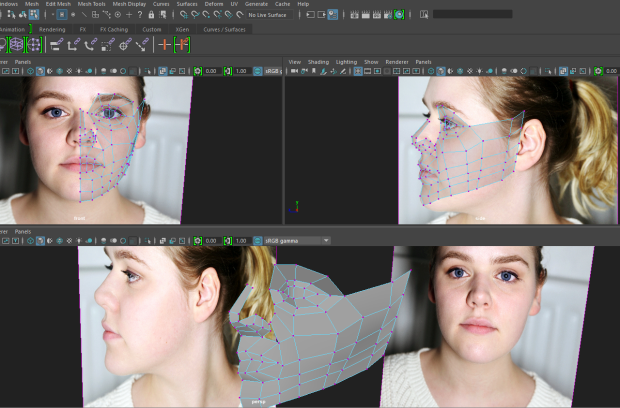
I eventually figured out how to so the nose properly, using the bridge and extrude tools then combining them to the side of the eye mesh. I then extruded the eye inward to create the eyeball and eyelid, then added creases to the mouth and eye area to define them when you hit the smooth view. I prefer to work in the non smoothed view as it is easier for me to see what is going on with the mesh, plus our tutors always told us not to rely on the smooth tool.

I then moved on to creating the back of the head so i got a square, put up the decisions so that it would become round and I started adding and removing sub divisions so that it matched to my own forehead divisions so that I would get that even flow. The side of the head was a lot harder to match up as I had to tweak how the topology would flow in this area and sadly the tutorial didn’t go into much detail here so I tried my best to get the right look for it. It then came to the time to add the dreaded ear which i was not excited for at all. The tutorial also did not go into detail for the ear and because it was low poly I didn’t know what to do for it but I gave it my best shot. I extruded the faces and tried to get the right placement, it didnt help that my images didn’t line up here but luckily I had my trust mirror and done my research as I knew that the top of the ears line up with the eye and the bottom of the ear line up with the bottom of the nose. I followed the basic shape of my ear and extruded in and then in again to create the outline of my ear.
After getting the right ear shape I tried different ways on getting the inner ear done but it just wasn’t working, it looked weird and lumpy with very messy topology so I decided to leave it as it was and move on to do the rest and then hopefully come back to it with fresh eyes and a new idea.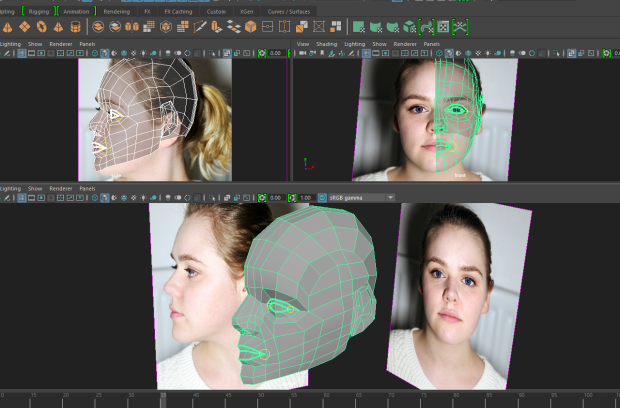
from here I mirrored it over but it did not look like me at all, It needed a lot of work especially the chin area, so I went back to the drawing board and got back up to speed to where was originally at.

After fixing some areas I also felt that there needs to be more definition in places to I added some edge looped where my cheek bone and bridge of my not is so that I could define it better and have more of my facial features. Referencing my post on my defining facial features that I had made. I then pulled at the vertex’s to define them more and to also add my button nose and the bumps that I have at the side of them.

When I smoothed it it let me see if my jaw needed more tweaking and it did, I felt that it wasn’t rounded enough and dipped in to much in the middle as you can see below. I also added a neck, looking back on the post I had made on drawing heads as it talked about neck fat, as well as facial anatomy and my Pinterest board to help me through this. This too a while to get right, I noticed that when I added the neck my chin didnt line up the curve to the neck and the fatty tissue in the neck brought it down too much and I needed to tweak it and bring the chin up a bit more, this also helping it to look like my chin more as I felt it looked too pointy.
I then continued the neck and brought it round to the back to create the back of the neck, making sure that it stayed fluid and matched it up with the ears okay. I then the neck so it would have the smooth curve down to where my shoulders would begin and made the mesh straighter for this as well.
I wanted to add more of a curvature to my lips to make it look more like me but that resulted in me created triangles, which is a big no no especially if its on the mouth which is a main source of expression in a human face, but I could not figure out a good way to fix these triangles without adding more loops or creating messy ngons, and making my topology messy. I definitely need to work on this more and figure out ways of fixing triangles in this area.
When I mirrored it over and tweaked it to line up with my other side of my face, because my left eye was slightly higher, the left side of my nose was slightly bigger and the left side of my jaw was more square, but I also noticed that my face looked too slim compared to my pictures as well as compared to what I was seeing in the mirror, I also noticed that my cheeks needed to be pulled forward in the side view because my cheeks are a lot chubbier, so I definitely had more tweaking do to make it look more like me.
When I added the crease around the lips I found that it made it look weird and overlap in the corners, I tried different ways of creasing it so that the corners would not over lap and spaced out the side of my mouth topology to make it look better.
After tweaking it and making it have more of my defined facial features I found that it looks more like me in the non smoothed version rather than the smooth version. I added creases to some edges and vertex’s around the eyes, nose and mouth to make it look more like me in the smoothed version. You can see the edges and vertex’s that i have added creasing to in the unsmoothed head model below, they are the thicker lines. I also added a cupids bow by extruding inwards and adding a crease to the lower part of the cupids bow. I tried to make the nose look more like mine, as I have bumps at the side of my nose I tried to replicate this but its not that easy when its low poly but I think I did a good job with it anyway.
Here is my family of heads;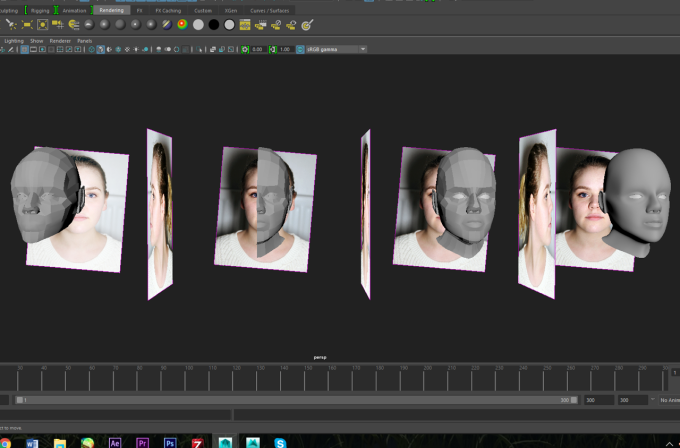
Final head model spin;
Overall I am fairly happy with how it turned out, for my first head model I’m proud of myself that I could even remotely make it look like me, even if it looks like a manly version of me. I’m excited to learn more in this area though, I do love modelling and I definitely want to improve on this more. It would be fun to create a more realistic one of myself in the future and then compare to how I began and what I know in the future, and maybe add hair, or possibly even animate it.